
How to Fix Peeling Paint: Easy Repair Guide for Lasting Walls
You walk into your bathroom, hallway, or bedroom, glance at the wall, and spot it: a cracked patch of paint curling away from the surface.
Your first instinct might be to grab a brush and paint right over it to hide the mess. But doing that is like sticking a small bandage over a wet sponge. The fresh paint simply sticks to the loose layer underneath, and within a few weeks, the entire patch falls off in an even bigger sheet.
Learning how to fix peeling paint the right way is not complicated, but it does take patience and the right order of work. If you follow the correct steps to prep, seal, and touch up the damaged area, your repair will blend in seamlessly and stay solid for years to come.
Why Is Your Paint Peeling in the First Place?
Before you pick up any tools, you need to understand what caused the failure. Paint is designed to grip surfaces tightly, so when it starts flaking off, an outside force is usually breaking that bond.
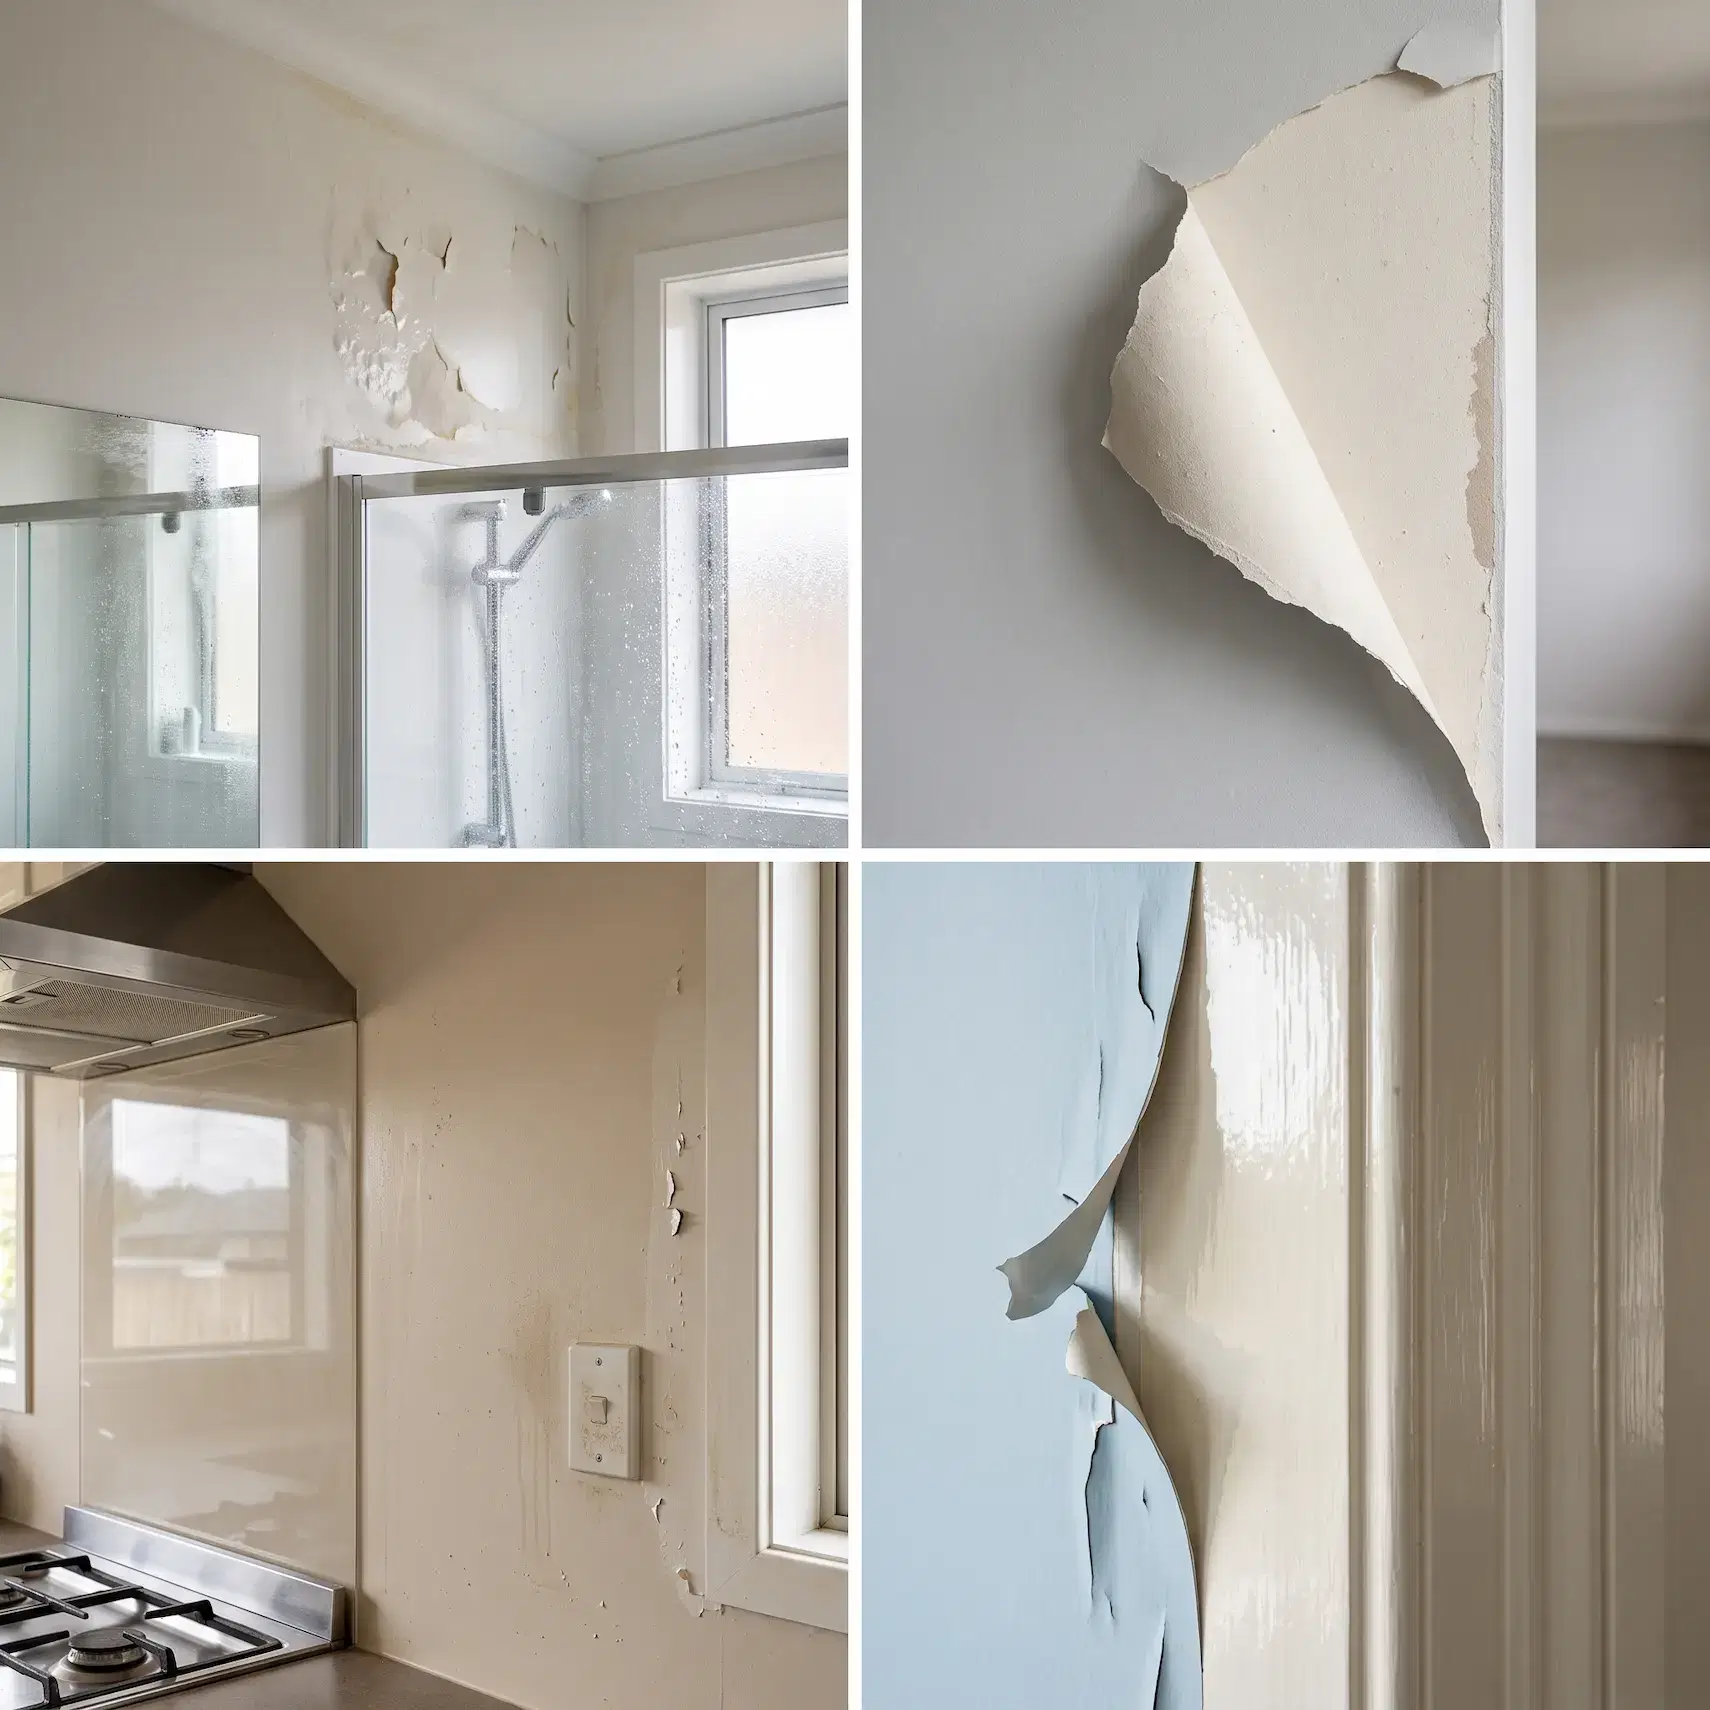
Once you fix the root cause, such as repairing a hidden plumbing leak or improving bathroom ventilation, you can start your peeling paint repair with complete confidence that the issue will not come back.
Tools and Materials You Need
Having the right tools within reach makes the job clean and painless. You do not need expensive commercial gear, just a few reliable trade essentials.
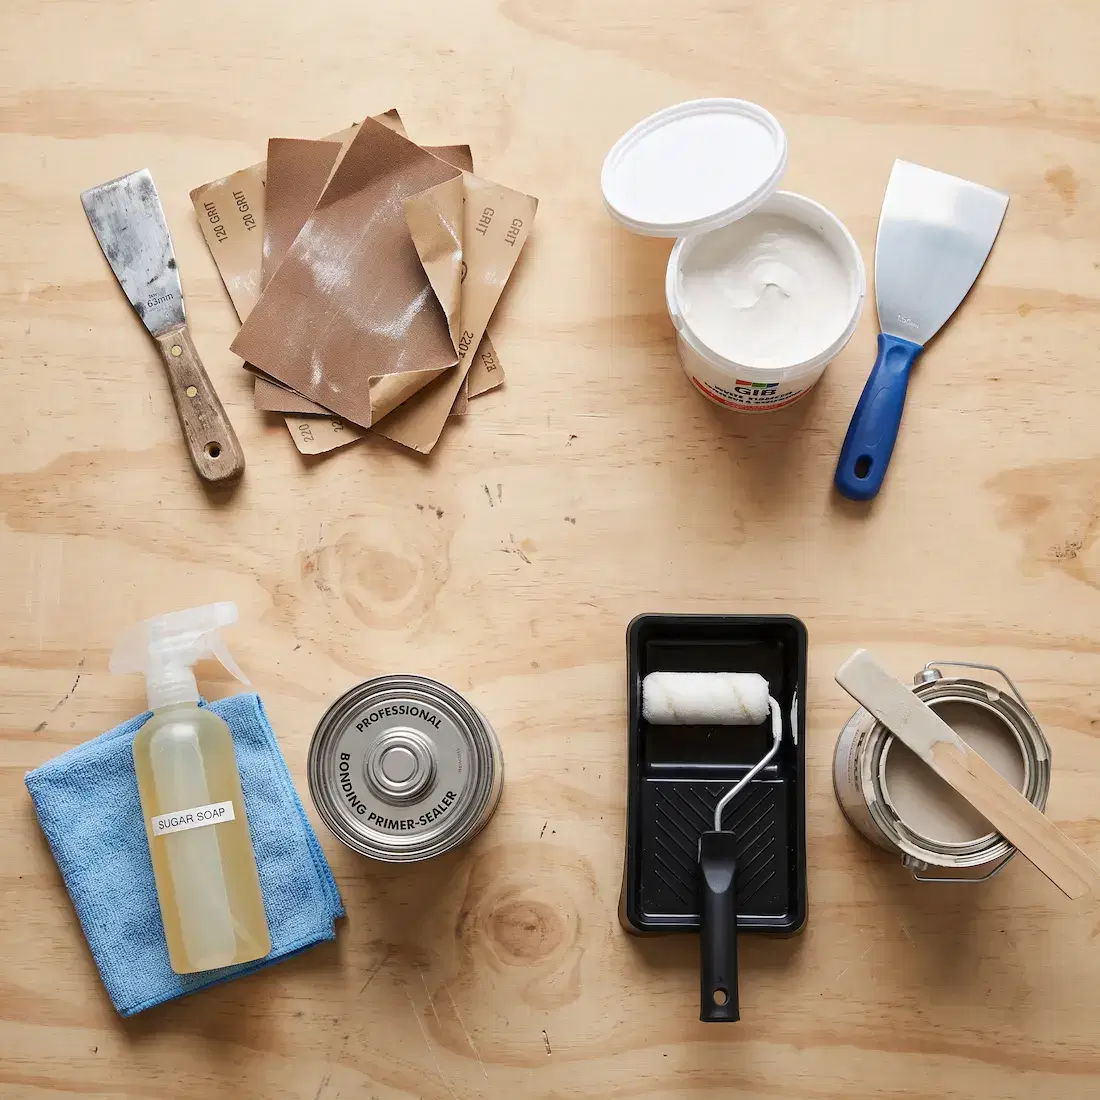
| Category | Items Needed |
| Scraping & Sanding | Putty knife (50–75 mm), 120-grit & 220-grit sandpaper |
| Patching & Levelling | GIB plaster stopping compound, 150 mm broad knife |
| Cleaning & Sealing | Sugar soap, microfibre cloth, bonding primer-sealer |
| Painting & Finishing | Matching wall paint, small roller sleeve, paint tray |
How to Fix Peeling Paint on Walls and Ceilings: Step-by-Step
When you set out to fix peeling paint on walls, rushing the drying steps is what ruins most weekend DIY projects. Give each layer the time it needs to cure, and follow these six practical steps.
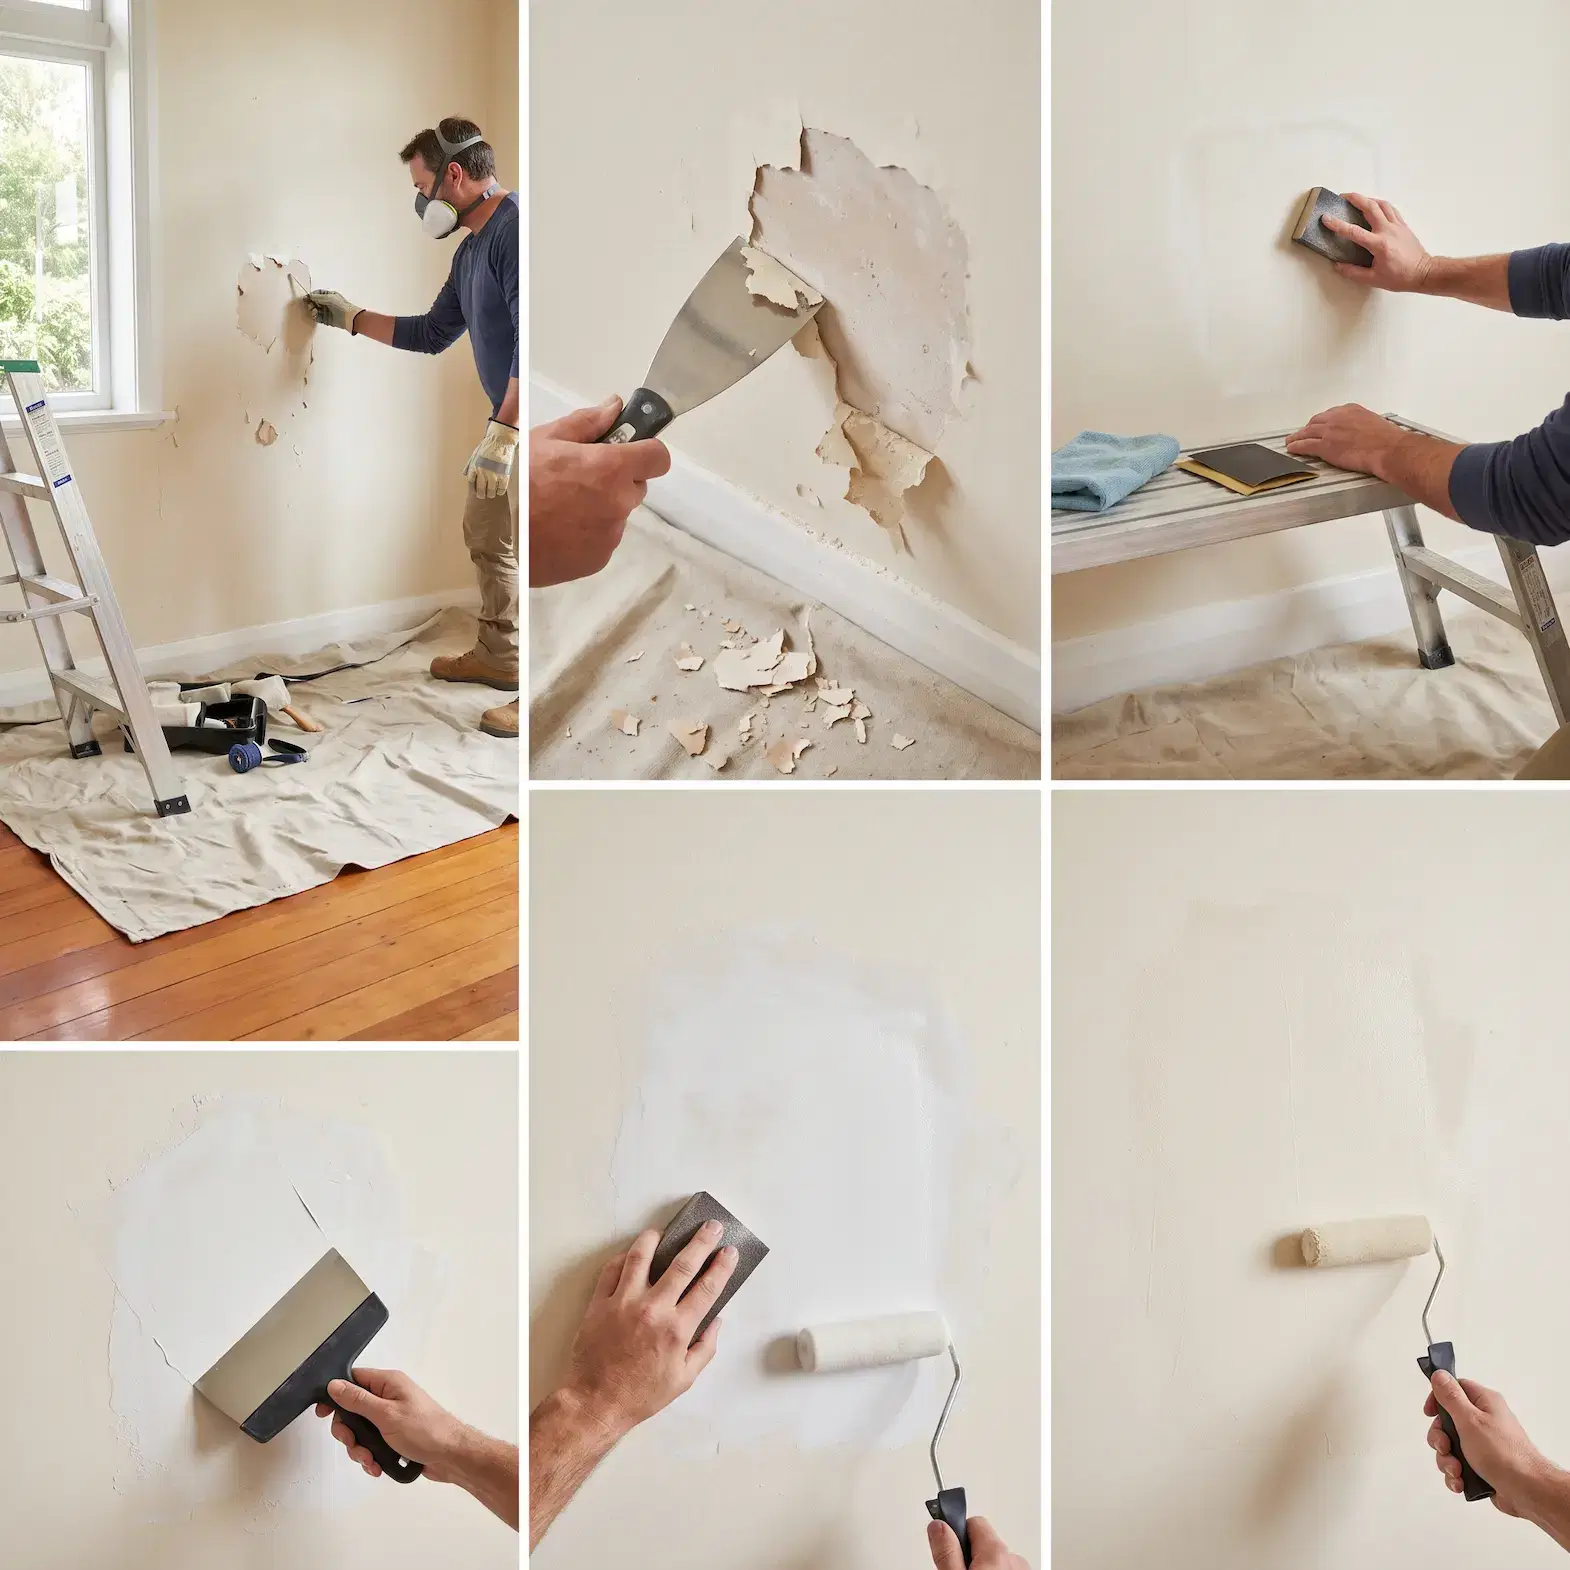
Step 1: Protect the Area and Check for Lead
Start by laying a heavy canvas drop sheet across the floor directly under the damaged area. Dry paint flakes have sharp edges that get trampled into carpet fibres or scratch timber floors.
If your home was built in New Zealand before 1980, test the paint for lead using an inexpensive swab kit from your local hardware store before doing any heavy scraping or sanding. If lead is present, use wet-sanding methods and wear an approved P2 respirator mask to keep yourself safe.
Step 2: Scrape Away All Loose Paint
Hold a flexible putty knife or a 5-in-1 paint scraper at a shallow 20-degree to 30-degree angle against the wall. Gently push the blade underneath the curling paint.
Work your way outward in all directions from the center of the damage. The goal here is to fix flaky paint by removing every single loose piece. Keep scraping until the blade stops lifting edges and hits firm, solid paint that is tightly bonded to the wall. If you leave even 2 millimetres of loose edge behind, your new patch will crack along that exact line.
Step 3: Feather-Sand the Hard Edge
Once the loose material is gone, run your fingers over the edge of the scraped patch. You will feel a sharp ridge where the old paint layers end and the bare surface begins. If you paint over that ridge now, the shape of the crater will remain visible under your light fixtures.
Take a block with 120-grit sandpaper and sand the boundary line in gentle circular motions. Feathering means tapering the hard edge down into a gentle slope so you can no longer feel the ridge with your fingertips. Once the edge is tapered, switch to 220-grit sandpaper to smooth the whole area, then wipe away every trace of dust with a damp cloth.
Step 4: Apply a Thin Layer of Plaster Compound
Now it is time to fill the shallow depression so the repair sits completely flush with the surrounding wall.
Scoop a golf-ball-sized amount of interior GIB stopping compound or fine surface filler onto a 150mm broad knife. Hold the knife at a 45-degree angle and draw the compound across the patch in one smooth, steady stroke.
Press firmly on the outer edges to feather the filler onto the painted wall, leaving the center slightly raised to allow for minor shrinkage. Never slap on one thick blob, as thick filler cracks while drying. If the depression is deeper than 3 millimetres, apply two thin coats, allowing 2 to 4 hours of drying time between each pass.
Step 5: Sand Flat and Seal with Primer
Once your compound has dried for 4 to 6 hours, take a fresh piece of 220-grit sandpaper and sand the patch until it is perfectly flat. Close your eyes and run your bare hand across the wall; if you feel any bump or hollow, keep sanding lightly. Wipe off the chalky gypsum dust with a damp cloth.
Next, apply a dedicated bonding primer or stain-blocking sealer over the raw plaster and feather it 50 millimetres past the repair onto the painted wall.
Raw filler acts like a sponge. If you skip this primer, the patch will suck all the moisture and sheen out of your topcoat, leaving a flat, discoloured blotch known as “flashing.” Let the primer dry for at least 2 hours.
Step 6: Apply Your Matching Topcoats
Pour your matching wall paint into a tray and load a short-nap 100mm mini roller. Roll out a thin, even coat directly over the primed patch.
To blend the repair into the rest of the wall, lighten your pressure as you roll outward toward the edges. This feathers the wet paint into the existing texture. Let the first coat dry for 2 to 3 hours, then apply a second thin coat. Once completely dry, the patch will blend smoothly into the wall.
Special Considerations: Fixing Peeling Paint on Ceilings and Wet Rooms
Dealing with a bathroom or laundry ceiling requires extra care because hot water vapour rises and collects directly overhead. When learning how to fix peeling paint on ceiling areas, two adjustments will save you from having to redo the job next winter:
- Wait for Total Dryness: Run your bathroom heater or extractor fan for 24 hours before making repairs. Never apply filler over cold, damp plasterboard.
- Upgrade Your Coating: Standard flat ceiling paint is porous and soaks up steam. After scraping, filling, and priming your ceiling, finish the entire surface with a dedicated moisture-resistant bathroom ceiling paint containing an anti-mould fungicide.
Common Mistakes That Ruin a Peeling Paint Repair
| Mistake to Avoid | What Happens | The Right Fix |
| Stopping the scrape too early | Weak edges lift beneath fresh paint | Scrape outward until the paint is impossible to peel |
| Skipping the feather-sanding step | A visible hollow or crater shows on the wall | Taper edges smooth using 120-grit then 220-grit paper |
| Applying topcoat over raw filler | The patch leaves a dull, faded spot (flashing) | Always seal raw compound with a quality bonding primer |
| Ignoring the underlying water leak | Paint bubbles and falls off again within months | Fix leaking pipes, roofs, or poor ventilation first |
When to Call a Professional Painting Team
If you have a couple of small, isolated paint chips around your living room or a door frame, you can easily tackle this over a weekend.
However, if paint is falling away in large sheets across entire walls, or if your ceilings are covered in bubbling patches, the problem is usually a system-wide adhesion failure. In those cases, the whole room often needs mechanical dustless sanding, skim-coating to a smooth Level 4 finish, and a full barrier-primer system.
At Capital Painting Services, we help homeowners throughout Porirua, and the wider Wellington region restore and protect their homes. As Dulux Accredited painters and certified Site Safe members, Phil and his team handle everything from minor plastering repairs to complete interior and exterior transformations.
If you are dealing with stubborn peeling walls and want a flawless, guaranteed finish, get in touch with our friendly team today for honest advice and a free, no-obligation quote.

