
How to Prepare a House for Painting: Complete Prep Guide
Around 80% of a long-lasting paint finish happens before you ever dip a brush into a can of paint. In New Zealand, cutting corners on preparation is the fastest way to ruin an expensive paint job. Between harsh Southern Hemisphere UV rays, driving coastal winds, and high winter moisture, Kiwi homes take a beating. If old paint, dirt, mould, and damaged timber are not treated properly, fresh topcoats will blister, crack, and peel within just two seasons.
Taking the time to prepare your interior and exterior surfaces correctly protects your investment, seals your home against the elements, and delivers a finish that stays sharp for 10 to 12 years.
Why Paint Preparation Matters More in New Zealand’s Climate
New Zealand conditions are particularly aggressive on exterior coatings compared to other parts of the world.
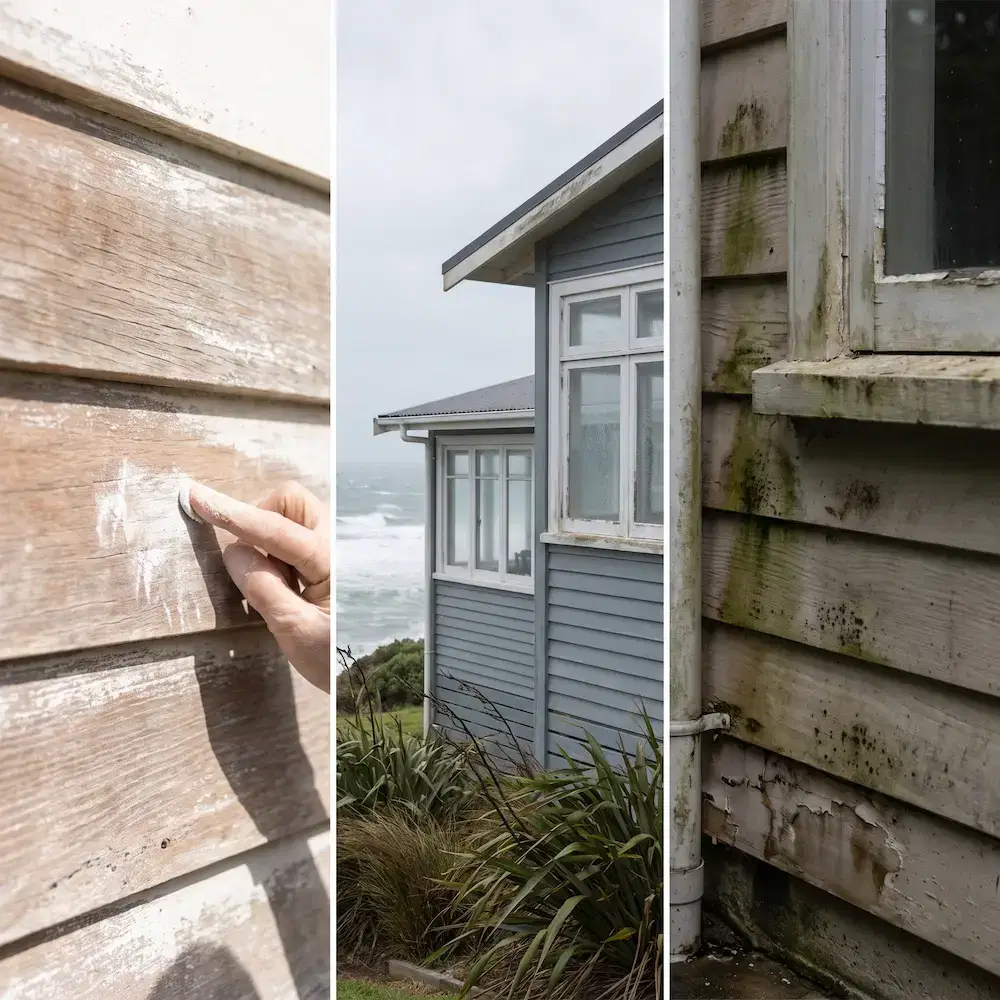
1. High UV Radiation and Chalking
New Zealand experiences peak UV levels that are roughly 40% higher than equivalent latitudes in the Northern Hemisphere during summer. This intense sunlight oxidises the chemical binders in old exterior paint, turning the top layer into a powdery white film known as chalking.
If you apply new paint over a chalky surface without washing and sealing it, the fresh coat will stick only to the loose dust rather than the solid substrate, leading to premature flaking.
2. Coastal Salt Air Residue
Properties in coastal areas like Titahi Bay, Plimmerton, Pukerua Bay, and the Kapiti Coast are constantly exposed to windblown salt spray. Microscopic salt crystals sit on weatherboards and window trims, absorbing moisture from the air.
Painting over unwashed salt residues traps moisture against the timber, causing paint to bubble and accelerating rust on steel fixings.
3. Deep-Seated Mould and Spore Growth
Damp winters and high humidity create the ideal environment for black mould (Cladosporium) and green algae to thrive. Pressure washing with plain water alone only blasts away the surface greenery, leaving living root systems inside the wood grain.
Applying topcoats over live spores traps the fungus, causing it to push through the new paint within six to twelve months.
Step-by-Step Exterior House Painting Preparation
Preparing an exterior requires a methodical sequence of cleaning, repairing, sanding, and priming.
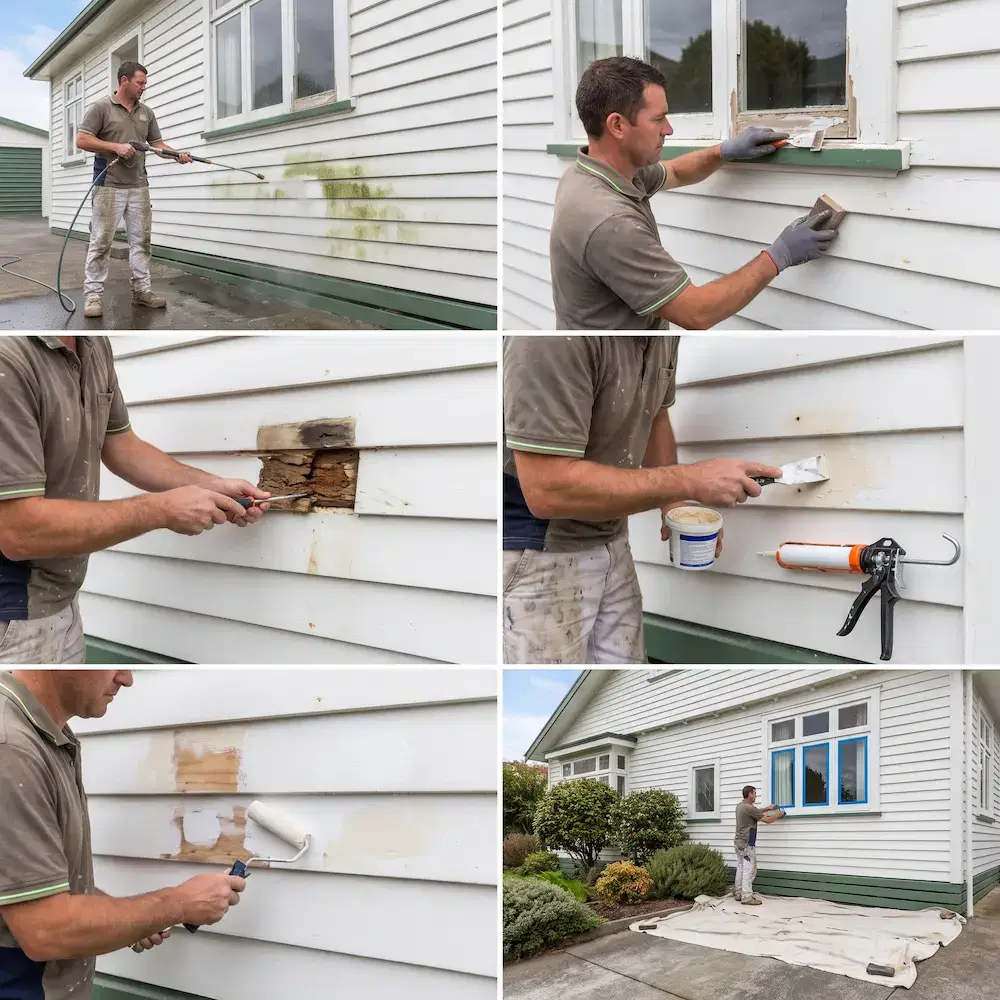
Step 1: Soft Washing and Mould Treatment
Never paint a dirty or mouldy exterior.
Step 2: Scraping and Feather-Sanding Loose Paint
Once the cladding is completely dry, strip back all compromised paint films.
Step 3: Checking for Timber Rot and Structural Damage
Before filling holes, inspect weatherboards, window sills, scribers, and fascia for decay
Step 4: Filling Cracks, Nail Holes, and Gaps
Exterior timber moves continuously with seasonal humidity changes. Choosing the correct filler for each area is essential.
Step 5: Spot Priming Bare Timber and Repairs
Topcoats are designed to protect against weather and provide colour; they are not formulated to bond directly to bare timber or porous fillers.
Step 6: Masking and Ground Protection
Protect non-painted elements before opening topcoat tins.
Step-by-Step Interior Painting Preparation
Interior preparation focuses on creating an ultra-smooth, clean surface free of grease, nicks, and dust.
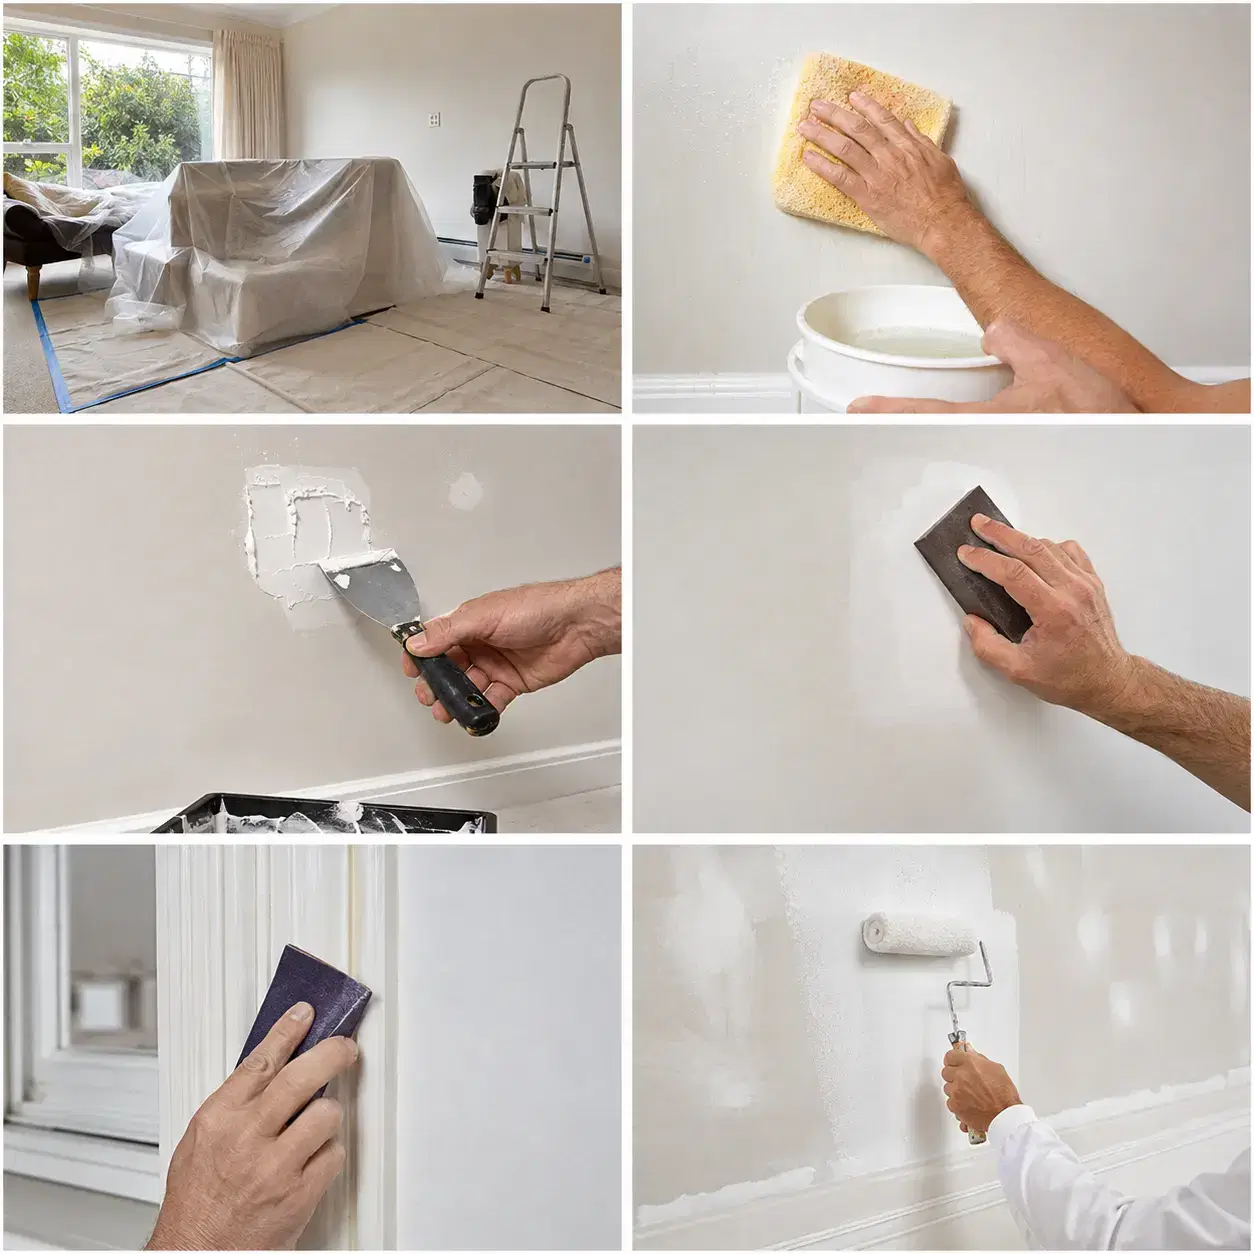
Step 1: Clear, Protect, and Remove Hardware
Step 2: Wall Cleaning and Degreasing with Sugar Soap
Wiping walls with a dry cloth is not enough to ensure paint adhesion.
Step 3: GIB Board and Plaster Repairs
Small imperfections become very obvious once low-sheen or semi-gloss paint is applied.
Step 4: Sealing Water Stains and Scuffing Gloss Surfaces
Common House Preparation Mistakes That Cause Paint Failure
|
Preparation Mistake |
Why It Happens |
The Consequence |
The Solution |
|---|---|---|---|
|
Painting Over Wet Timber |
Skipping the 24–48 hr dry window |
Moisture turns to vapour in sun, blistering the paint film |
Check timber with a moisture meter (<15% MC) |
|
Skipping Primer on Bare Wood |
Trying to save time and material |
Topcoat soaks unevenly into wood, peeling within 18 months |
Apply an oil-based primer to all exposed timber |
|
Using High-Pressure Water Blasts |
Attempting to clean too fast |
Gouges cedar/pine grain; injects water behind weatherboards |
Use low-pressure soft washing (<800 PSI) with biocide |
|
Bridging Weatherboard Laps |
Over-caulking horizontal lines |
Traps condensation inside wall cavities, causing rot |
Caulk only vertical corner joints and window facings |
|
Using Interior Filler Outside |
Grabbing standard GIB stopping |
Interior compound dissolves in rain, blowing off topcoats |
Use 2-part exterior epoxy or exterior timber filler |
DIY Preparation vs Hiring Professional Local Painters
Carrying out thorough preparation on an average three-bedroom Kiwi home (approx. 120m² to 150m²) requires 35 to 55 hours of manual labour before applying a single coat of colour.
While interior prep can be tackled room-by-room as a DIY weekend project, full exterior preparation often involves working at heights, managing lead-based paint risks on pre-1980s homes, and using specialized scaffolding under strict New Zealand Site Safe protocols.
Professional Painting Services Across Porirua and Wellington
Thorough preparation is the difference between a paint job that starts peeling after two winters and a durable finish that protects your home for over a decade. Getting the cleaning chemistry right, checking timber moisture levels, and using the correct primers ensures your paint system performs as designed.
At Capital Painting Services, we provide residential and commercial painting across Porirua, Whitby, the Kapiti Coast, and the wider Wellington region. As Dulux Accredited painters and certified Site Safe members, Phil and his team carry out preparation to the highest trade standards using premium Dulux and Resene systems. If you are planning an upcoming interior or exterior project, contact our local team today for an on-site assessment and a free quote.


